How Safe Is an Outdoor Socket Box for Your Home and Garden
An outdoor socket box is often treated as a small, utilitarian afterthought. In reality it is a critical component of any exterior electrical system. The interior volume, the way conductors are arranged, and how entry points are handled determine whether connections remain reliable over time or become a safety risk. A well-chosen enclosure makes wiring work easier, reduces thermal hotspots, prevents insulation wear, and makes routine inspections quick and robust..
Before choosing an enclosure, write down every conductor, terminal block, device and splice that will live inside it. Include hot, neutral and ground conductors, plus control, signal and low-voltage cables. Don’t forget things that are easy to overlook: pigtails, ground bars, bridging jumpers and any sensing or communication wiring. After itemizing, add a safety margin — plan for roughly 20 to 40 percent more space than the initial count to allow for future additions and room to work.
Why this matters: cramped interiors demand sharp bends and compressed terminations. Tight bends place mechanical stress on insulation and conductors, while crowded terminals are harder to inspect and re-torque correctly. Heat produced by high-current conductors also needs space to dissipate; leaving air volume around hot components reduces the risk of heat-related degradation.
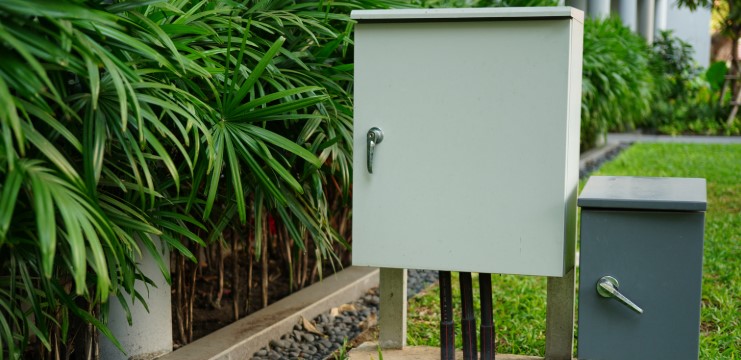
Choose a mounting location that balances protection from the elements and ease of service. A box tucked beneath an overhang or in a recessed niche avoids direct sun and good driving rain, which extends gasket life and reduces UV damage. Accessibility is a safety factor: if routine checks require a ladder or dismantling of surrounding structures, inspections will be skipped or rushed. Place boxes where a simple visual inspection and a basic hand-tool adjustment can be performed safely from the ground or a stable working position.
Avoid locations that funnel water or debris into the enclosure — low gutters, wind channels on corners, or under drip lines. Also avoid mounting where vegetation will grow into the box or where animals can nest nearby. If an environment is particularly exposed (coastal salt spray, heavy industrial particulates, or frequent freeze-thaw), select materials and finishes that match those challenges.
A securely mounted box prevents vibration, shifting, and the gradual loosening of hardware — all common contributors to poor terminations. Match fasteners to the substrate: use masonry anchors for concrete or brick, structural screws for wood, and appropriate metal anchors for steel structures. Always choose corrosion-resistant fasteners such as stainless steel where the box will face moisture or salt.
Make sure the box sits plumb and flush where required by accessories. If the enclosure is slightly out of plane, conduit and cable entries will experience leverage, transmitting stress to terminals and gland fittings. Provide backing or reinforcing plates for large or heavy enclosures, and add vibration-damping pads where machinery or traffic induces movement.
Sealing is not glamorous, but it’s essential. Use manufacturer-recommended gaskets at the cover interface and verify that gaskets are seated and undamaged before closing. For cable entries, install cable glands or use sealed conduit fittings sized to the conductor and sheath. Unused knockouts must be fitted with blanking plugs rated for outdoor use; tiny openings are invitations for insects and rodents that can cause insulation damage or short circuits.
Select sealants and tapes that are explicitly rated for electrical enclosures — not all construction sealants are electrically compatible or UV-stable. Be mindful of material compatibility: some sealants will accelerate corrosion when in contact with certain metals or plastics. When secondary sealing is applied, use it sparingly to avoid trapping heat or making future maintenance difficult.
Inside the box, create clear zones for high-current conductors, control circuitry, and low-voltage signal wiring. Separating these functions reduces electromagnetic interference and simplifies troubleshooting. Keep terminals and splices visible and reachable; if a connector is buried beneath a tangle of cables, it will be skipped during inspections and is likely to fail.
Design modest service loops for each termination so that meters and tools can be connected without stressing the conductor. Use cable ties, DIN rails, or internal ducts to secure harnesses neatly and prevent conductor movement. For multi-device enclosures, place devices so that their straps and mounting screws do not obstruct access to adjacent terminals.
Before applying power, run through a systematic checklist:
This verification reduces the chance that an installation passes initial inspection but later produces field failures.
Mistake: Choosing The Smallest Box That Fits The Parts. Fix: Buy a slightly larger enclosure that allows for service loops and future expansion.
Mistake: Applying Sealants As A First Resort. Fix: Use Proper Glands And Gaskets First; Apply Sealant Only Where It Provides Real Value.
Mistake: Co-Mingling Signal And Power Conductors. Fix: Physically Separate Or Use Barriers To Lower Interference And Simplify Replacement.
Plan routine inspections on a schedule appropriate to the environment: annually for typical residential settings, more frequently in corrosive or high-moisture locations. During each check, look for brittle gaskets, corroded fasteners, loose terminations, and crushed or pinched conductors. Replace gaskets and any suspect fasteners proactively — small preventive actions avoid major failures.
Record the date of each inspection, the torque values applied to critical terminals, and any parts replaced. Keeping a project file with enclosure model, IP rating, fastener types and installed gland models simplifies later maintenance and ensures replacements match the original protection level.
Use a color-coded labeling system for conductors so that a future technician can identify circuits at a glance. Keep spare blanking plugs, a replacement gasket, and a small tube of compatible sealant in the box for emergency repairs. Where high-current conductors are present, specify terminals and connectors rated above expected load to avoid marginal connections.
When possible, pre-fit glands and mounting plates before final wiring to avoid working in cramped, awkward positions. Design the layout so that routine tasks such as reading sensors, replacing fuses, or swapping a controller can be performed without disturbing critical power connections.
Treat the outdoor enclosure as an integral part of the electrical design, not an afterthought. Thoughtful counting of conductors, choosing the right box size, placing it where it can be protected and serviced, using robust mounting and proper weatherproofing, and organizing internal wiring all add up to a reliable outdoor electrification system. Small investments in space, material compatibility and layout planning pay dividends in safety, longevity and serviceability — and they prevent many of the messy, costly failures you see reported in field incidents.Fly-Dragon Electrical Co., Ltd.
 +86-577-62731897
 shireen@nante.com
 No.688 chezhan Road, Liushi town, Wenzhou, China
Copyright © 2024 Fly-Dragon Electrical Co., Ltd. All Rights Reserved.
![]() 浙公网安备33038202003041号
浙公网安备33038202003041号
 Privacy
Outdoor Socket Box Factory & Outdoor Electrical Distribution Panel Factory


 English
 Español
 Português
 Deutsch


