How to Install a Waterproof Outdoor Box for Sockets Safely
Outdoor electricity use has become part of everyday spaces. Gardens, patios, small workshops, and outdoor lighting setups all depend on stable power access. Once sockets move outside, they face a very different environment compared with indoor walls. Rain, dust, temperature changes, and accidental contact all become part of daily exposure.
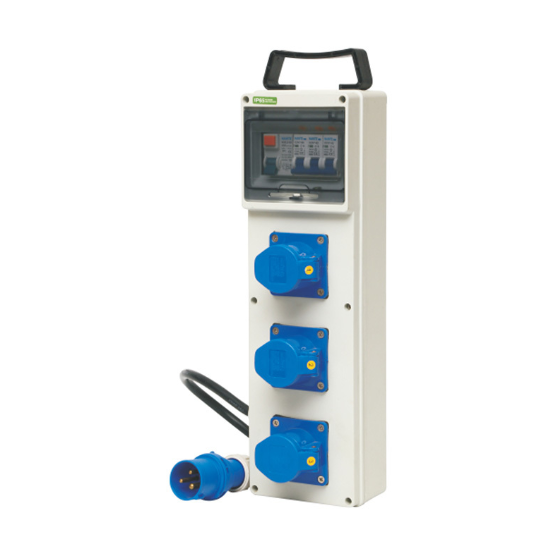
A waterproof outdoor box for sockets helps reduce these risks. It acts as a protective layer that separates electrical connections from direct environmental impact. Installation is not only about fixing a cover on a wall. It involves choosing a safe position, preparing the surface, securing the structure, and making sure the socket remains usable in real conditions.
A careful installation process can reduce common outdoor issues and improve long-term stability.
Indoor sockets sit inside steady, sheltered spaces, but outdoor units face constantly shifting weather and surroundings.
Rain leaves dampness on exterior fittings, wind blows dirt and soil onto the sockets. Gardening gear and people moving nearby also raise the chance of bumps or accidental touches.
Left unprotected, all these elements slowly wear down the outlet. Contacts loosen over time, and the casing gets scratched and worn more easily.
Sealed waterproof enclosures block direct exposure to the elements. They don't alter electrical flow, just form a physical barrier separating the socket from outside conditions. This basic shielding lets you use power outdoors safely and reliably.
Before fixing anything to the wall, the surrounding environment needs attention. Outdoor spaces are rarely uniform, so location choice matters more than the installation step itself.
A suitable position usually has:
It also helps to think about how the socket will be used later. A location that feels convenient for one device may become limiting when more outdoor tools are added.
A short planning stage can prevent unnecessary repositioning later.
Position is often the overlooked part of installation.
A socket box placed too low may face splashing water or soil contact. A position too high may make daily use uncomfortable. Corners that trap moisture or dust may also reduce long-term cleanliness.
A balanced position usually sits at a height that is easy to reach while staying away from direct ground exposure.
It also helps to avoid areas where water naturally flows during rain. Even with waterproof protection, constant water pressure is not ideal for long-term use.
In many real setups, sheltered wall areas near patios or side structures are commonly chosen because they offer both access and partial protection.
Surface condition plays a big role in stability after installation.
Outdoor walls often carry dust, uneven texture, or small debris. If the surface is not prepared properly, the box may not sit evenly, and small gaps can appear around the edges.
Before installation, the surface should be:
A stable base helps the box sit firmly against the wall. This reduces movement over time and improves sealing consistency.
Even small uneven areas can affect how tightly the box fits.
After picking your mounting spot and prepping the wall surface, you can start fitting the box.
Line up the enclosure perfectly before fully screwing it down. If it sits crooked, one side will bear extra pressure and tiny gaps will form over time.
Follow these steps while securing it:
A firm, level fit stops the box from shifting with daily use. It also keeps the full weather-seal intact all around the rim.
Getting proper alignment matters far more than cranking the screws overly tight.
You need to take care with wiring inside the waterproof casing. The outer shield only blocks outside moisture; messy internal wiring still ruins long-term reliability.
Keep these points in mind as you connect wires:
Neat wiring makes future maintenance quick and puts less stress on wire terminals.
Even minor tangled wiring inside the case weakens the whole setup over time.
After installation, the cover becomes part of daily operation.
Its main role is simple. It stays closed when not in use and opens only when access is needed. This reduces direct exposure to environmental conditions.
In daily practice, the cover should:
If the cover is not closed properly, its protective effect can be reduced. Small gaps can allow dust or moisture to enter over time.
Many issues come not from the product itself but from installation habits.
Some frequent mistakes include:
Each of these may seem small at first. However, in outdoor conditions, small issues tend to grow over time.
Careful installation reduces future adjustments and improves consistency.
Once installed, the box still needs occasional attention. Outdoor environments change with seasons, weather, and usage patterns.
Simple maintenance habits include:
These small steps help maintain stable performance without frequent repair work.
Maintenance is not about complexity. It is about consistency over time.
Installing a waterproof outdoor socket box is not a highly complex process, but it depends heavily on attention to detail.
Outdoor electrical use is affected more by environment than by structure. Rain direction, surface condition, and usage habits all influence performance.
A well-positioned and properly installed box can handle these conditions more smoothly. Most issues come from small oversights rather than major mistakes.
A steady installation approach, combined with simple maintenance, usually provides more reliable results than complicated methods.
In outdoor environments, stability is built through simple actions done carefully and consistently.
 +86-577-62731897
 shireen@nante.com
 No.688 chezhan Road, Liushi town, Wenzhou, China
Copyright © 2024 Fly-Dragon Electrical Co., Ltd. All Rights Reserved.
 浙公网安备33038202003041号
 Privacy
Outdoor Socket Box Factory & Outdoor Electrical Distribution Panel Factory



 English
 Español
 Português
 Deutsch