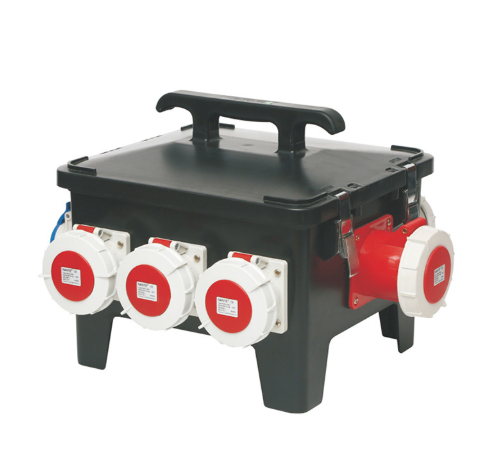
Over the years running my hardware shop, I've fitted countless outdoor sockets for folks tackling gardens, decks, patios, or even garage setups. You can't mess around with safety out there—plain indoor boxes turn into disasters the first time it rains. A sturdy Waterproof Outdoor Box for Sockets changes all that, wrapping your sockets and wires in real protection against water, muck, and whatever the weather dishes out, so no shocks or breakdowns sneak up on you.
Key Reasons for Installing a Waterproof Outdoor Box
- Full Weather Protection Outdoor sockets deal with direct rain, water from sprinklers, morning condensation, snow, and fine dust regularly. Any gap lets moisture inside and starts trouble. A genuine weatherproof electrical box seals everything tight and keeps the contents completely dry.
- Avoiding Electrical Accidents Water touching live parts can cause immediate shocks, sparking, circuit failures, or even fires. A well-chosen and fitted outdoor electrical enclosure stops water from getting anywhere near the electrics, making those risks much lower.
- Long-Lasting Strength Outside setups face strong sun, freezing nights, high heat, and steady dampness. Good Waterproof Outdoor Box for Sockets use heavy-duty, sun-resistant plastics or metals that guard the sockets and wires for many years of steady performance.
- Following Electrical Codes Most building and electrical regulations insist on waterproof enclosures for any external socket. Choosing and using the correct Waterproof Outdoor Box keeps the installation legal, ready for checks, and covered by insurance.
Pick a solid outdoor socket box and install it right, and your outdoor sockets will stay safe and working perfectly through all kinds of weather.
Materials Needed for Installing a Waterproof Outdoor Box for Sockets
Before starting the job, gather everything you'll need to fit a weather-sealed outdoor socket box properly and safely. Having the right gear on hand makes the whole process smoother and helps ensure a watertight, long-lasting result.
Essential Items List
- Waterproof Outdoor Box: Pick one with a tight-sealing lid—usually built from tough plastic, fiberglass, or metal that stands up to the weather.
- Weatherproof Socket Outlet: Go for outlets specifically rated for outdoor use that fit neatly inside the waterproof junction box.
- GFCI Outlet (Strongly Recommended): Especially if the spot is close to water sources, a Ground Fault Circuit Interrupter outlet adds an extra layer of protection against shocks.
- Screws and Mounting Brackets: Needed to fasten the waterproof junction box securely to the wall, post, or chosen surface.
- Conduit (Flexible or Rigid): Use this to shield and route the cables safely, whether running through walls, along surfaces, or underground.
- Silicone Sealant: Apply this around edges and entry points to close off any gaps and keep the weatherproof outlet box completely watertight.
- Wire Strippers: For cleanly cutting and preparing the ends of the electrical cables.
- Voltage Tester: Critical tool to confirm the power is switched off before you touch any wires.
Screwdriver, Drill, and Wall Anchors: These help drill pilot holes and firmly attach the weatherproof outlet box to brick, wood, siding, or whatever surface you're working on.
With these materials ready, you'll be set to create a safe, code-friendly outdoor power point that stays protected inside a reliable outdoor power box.
Step-by-Step Guide to Installing Your Waterproof Outdoor Box
You've got the materials sorted—now it's time to get the outdoor power box installed right. I've done dozens of these over the years, and taking it slow with safety in mind always pays off.
- Step 1: Kill the Power Completely
- First thing, every time: go to the main breaker and flip off the circuit you're tapping into. Then use your voltage tester right at the work spot to make sure nothing's live. Test it, test it again—better safe than sorry.
- Step 2: Find the Smart Location
- Choose a spot for the Waterproof Outdoor Box that's practical and protected:
- Out of direct downpours or hose spray (under roof overhangs or a sheltered wall is ideal)
- Handy to use but clear of bumps from tools, bikes, or play areas
- As close as possible to your indoor power feed to keep cable runs short and neat
- Step 3: Fix the Waterproof Outdoor Box in Place
- Get it mounted solid so it never shifts:
- Position and Mark: Press the water-resistant electrical box against the surface and pencil-mark the screw holes.
- Drill Clean Holes: Pick the right bit for your wall type and anchors, then drill straight at each mark.
- Screw It Tight: Line the water-resistant electrical box up, drive in the screws, and snug them down firmly—no wobble allowed.
- Step 4: Wire Up the Socket
- Time to put the weatherproof outlet inside the mounted Waterproof Outdoor Box:
- Prep the Cables: Strip back about half an inch of insulation from each wire end with your strippers—nice and clean.
- Hook Them Up Right: Black (or red) hot wire to the brass screw, white neutral to silver, bare or green ground to the green terminal. Crank every screw down hard.
- Fold and Fit: Neatly tuck the wires in and slide the outlet into the sealed outdoor socket box without trapping or kinking anything.
- Lock It Down: Fasten the outlet to the box with its screws so it's rock steady.
- Step 5: Seal the Waterproof Outdoor Box Properly
- This is what makes it truly waterproof—don't rush the sealing:
- Lay Down Silicone: Run a good bead of sealant around the back rim and every cable entry before you close it.
- Close the Lid: Snap or screw on the waterproof cover, making sure the gasket seats fully and everything pulls together tight.
- Final Check: Go over the whole sealed outdoor socket box for tiny gaps and dab extra silicone anywhere needed.
- Step 6: Prove It Works and Stays Dry
- Only call it finished once you've tested everything:
- Power Back On: Return to the breaker and switch the circuit live again.
- Test the Socket: Plug in a lamp or use your tester to confirm steady power. If you fitted a GFCI, push the test button and reset it to check the trip works.
- Water Check: Give the rainproof outdoor electrical box a gentle hose spray (or wait for rain) and peek inside to confirm it stays completely dry.
- Do it this way, and your Waterproof Outdoor Box will deliver safe, dependable outdoor power that shrugs off rain, wind, and years of use.
From what I've seen helping customers in the shop, putting in a rainproof outdoor electrical box is pretty straightforward—most folks knock it out in an afternoon with the basics on hand. Do the steps right, and you've got something solid, safe, and up to whatever codes your local inspectors enforce. Solid Waterproof Outdoor Boxes paired with good outlets give you handy power outside without ever second-guessing storms or splashes.
One thing I always tell people: if wiring isn't your thing or something feels off—like feeding new cable from the panel—call a licensed sparkie. No shame in it; electricity bites hard when things go wrong.
Easy Upkeep for Your Waterproof Outdoor Box
- Look It Over Regularly: A couple times a year, check the lid seal, gaskets, and edges of the Outdoor Box for cracks, dryness, or anything loose.
- Stay Clean: Brush or wipe off dirt, leaves, mud, or cobwebs that pile up and could stop the cover closing properly on the weather-sealed outdoor socket box.
- Swap It Out When Tired: Once the weather-sealed outdoor socket box starts cracking from sun, fading bad, or just looking beat after years, replace it fresh—no sense risking leaks down the line.
Stick to the install method and these quick checks, and your Waterproof Outdoor Box will keep outdoor power running safe and dry for ages.
 Home / News / Industry News / Waterproof Outdoor Box for Sockets Installation Guide: Step-by-Step Tips
  +86-577-62731897
 shireen@nante.com
 No.688 chezhan Road, Liushi town, Wenzhou, China
 Privacy


 English
 Español
 Português
 Deutsch


